


DIY Stainless Steel Co2 Generator Kit – 1.3L
$119.99 inc. tax
- Premium-Quality 1.3L Stainless Steel DIY Co2 Generator
- Full Kit – excluding Citric Acid & Baking Soda
- Recommended for tanks 60L and below
- Cheaper Co2 Refills!
- In-built Solenoid allows full control over your Co2 Injection
Description
DIY Stainless Steel Co2 Generator Kit – 1.3L
Introducing our DIY Stainless Steel CO2 Generator – a great beginner’s step to injecting Co2 into your planted tank. This ingenious and efficient CO2 injection system will allow you to raise the Co2 levels in your nano tanks in order for your aquatic plants to thrive, grow healthier and have improved colouration.
With a generous 1.3L capacity, this stainless steel marvel comes with all the necessary equipment to get your DIY Co2 Injection system started.
Instructions for Using DIY Stainless Steel CO2 Generator:
- Prepare Your Mixtures: Acquire 90 grams of Citric Acid (Mixture A) and 100 grams of Baking Soda (Mixture B) – please note that these materials are not included.
- Assemble with Ease: Begin by attaching the Filter Membrane securely to the bottom of the CO2 Regulator.
- Prepare the Cylinder: Insert the Plastic Funnel into the Stainless Steel CO2 Cylinder.
- Mix It Up: Carefully add 90 grams of Mixture A (Citric Acid) followed by 100 grams of Mixture B (Baking Soda) into the Stainless Steel CO2 Cylinder.
- Add Water: Tilt the cylinder at a 45-degree angle and pour 150ml of tap or distilled water into it.
- Secure the Regulator: Fasten the CO2 Regulator onto the Stainless Steel CO2 Cylinder.
- Monitor the Reaction: As you attach the CO2 Regulator, you’ll observe the pressure gauge begin to rise. The reaction should complete after 10 hours, but you can start diffusing CO2 into your tank before that.
- Fine-Tune Your Setup: Insert the Quick-Plug bubble counter onto the CO2 Regulator. Connect the 12V plug to the solenoid on the Quick-Plug bubble counter. Fill the bubble counter 3/4 full with water, then connect the CO2 Proof tubing from the bubble counter to the check-valve and finally to the CO2 Diffuser.
- Complete the Setup: Attach the CO2 Diffuser into your tank and secure the tubing in place with the provided premium suction cups.
- Optimal CO2 Levels: Adjust the bubble counter to your desired CO2 injection levels, typically around 1.5 bubbles per second.
Packing List:
- 1.3L Stainless Steel CO2 Cylinder
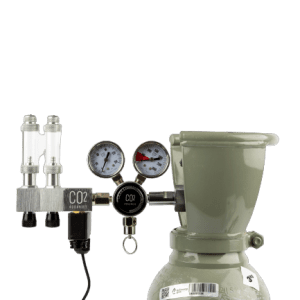
- Single Gauge CO2 Regulator
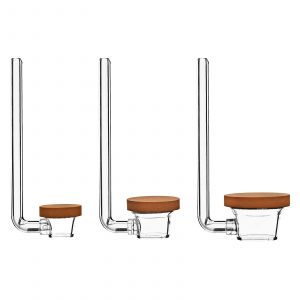
- Quick-Plug Bubble Counter with Solenoid
- 12V, 0.5A AU/NZ Plug
- Filter Membrane
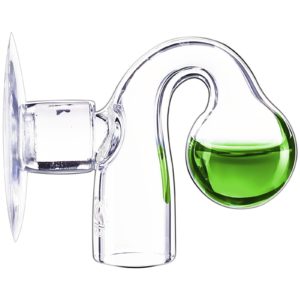
- Acrylic CO2 Diffuser
- 2x Premium Suction Cups
- 1x Check Valve
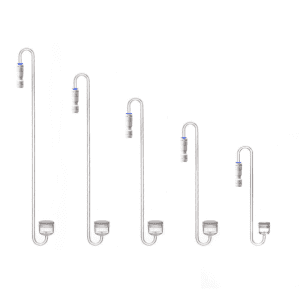
- 1.5m of CO2 Proof Tubing
- Plastic Funnel
- Spare Parts & Tools
- Instruction Booklet
Additional information
| Weight | 2 kg |
|---|---|
| Dimensions | 22 × 10 × 30 cm |
1 review for DIY Stainless Steel Co2 Generator Kit – 1.3L
You must be logged in to post a review.

Next day shipping on dry goods.

Free product support and advice.

Meredith Hale (verified owner) –
Seems a good kit, a shame it doesn’t have the plastic base pictured for stability. My kit also didn’t come with instructions, beyond what is printed in poor English on the bottle, no leaflet sadly. This meant no quantities for the ingredients were given – not on the bottle, not on the packaging, lucky this website had good info for me to write down! The metal components seem solid and well made, looking forward to installing and testing it.